Layton ServiceDesk - Settings - Company Structure - Manage End User
![]() Previous article in this series: Manage Analyst Group
Previous article in this series: Manage Analyst Group
Contents |
Overview
Depending on your organization, End Users are company employees, students, contractors, external clients, and even the general public. End Users have reduced access to the system to allow for the primary role of request submission. Depending on the Security configuration, End Users are permitted to create, view, search, and update Requests, as well as view their assigned Changes, submit Surveys, and view the Solution Base.
Once they are entered into the system, the End User accounts may be configured in the Manage End User page:
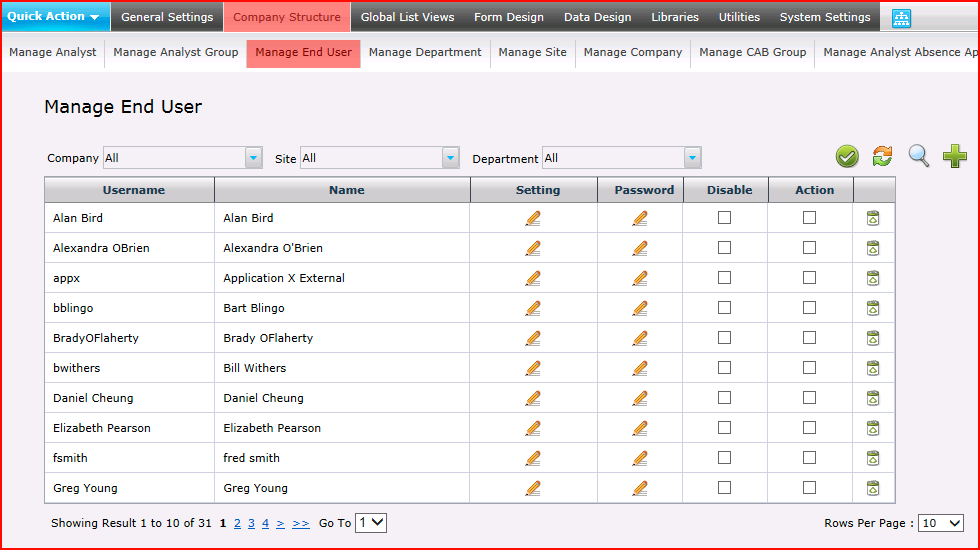
It is important to configure the end users in a way that syncs with your organization's needs. For example, if single sign-on is desired, then it is best to import the users from Active Directory using the LDAP (Active Directory) Import End User utility. This will import the user accounts as defined in Active Directory, allow the mapping of Active Directory attributes to fields on the End User table in ServiceDesk, and automatically enable NTLM Login.
Once the End Users are added, they may also be categorized manually into their respective Company, Site, and Department from within the End User's Account Properties. These, along with the End User's contact information, are among several other default settings on the End User account form. This is a customizable form which may be modified in Administration > Form Design > End User to add new fields, and remove or modify the default fields. If there are no fields to meet your requirements, new user-defined fields may be added at any time in Data Design.
Lastly, the End User Settings allow the Administrator to easily manage each End User's Request Class permissions, as well as restrict Request access based on the End User's Site, Department, and Company.
If you have enabled the Company Level option, then a Company may be associated with the Site. The Site form may be modified in Administration > Form Design > Site.
Filters

The list can be filtered on Company by selecting a Company in the Company menu, Site by selecting a Site in the Site menu and Department by selecting a Department in the Department menu. Any combination can be used.
Row Count
Rows Per Page
This control sets how many rows will be displayed per page. Making the number of rows less will result in a shorter page and a faster load time. Useful for when there are many Sites (more than 50).
Page Number
When the number of End Users exceeds the number of Rows Per Page, multiple pages will be created. To navigate, click a page number link or click the Go To field to enter a page number to jump to, then press Enter. Alternatively, click the down arrow in this field to select a page number to jump to.
Bulk Operations
This function is used to relocate a number of End Users to a different Company and/or Site at once.
Procedure
- Check the Action checkbox for all the End Users that you intend to move.
- Click the confirm button
 .
.
- Conditional: If the End Users are not all currently in the same Site, you will get this dialog:
This simply means that the Site that appears in the next step will be that of the first End User selected. Click the Save button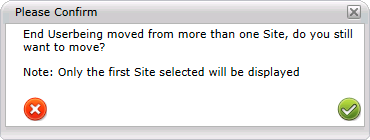
 to proceed.
- Using the Company and Site menus, select the Company and/or Site to which you want to move the End Users:
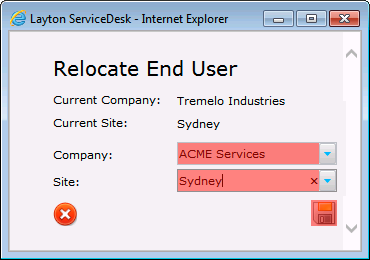
- Click the Save button
 .
.
Properties
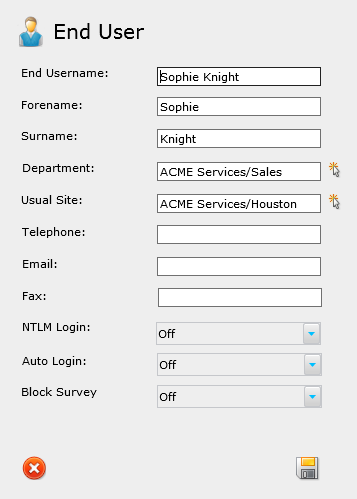
This section has basic account settings to configure the End User name, contact information, Department, Site, and NTLM and Auto Login settings. Any settings changes will not take effect until the End User logs out and then logs in again.
End Username
The username for the End User. This will be used to identify the End User throughout the system. Once the account has been created, the username may not be changed. It is essential to identifying all information related to the End User.
Forename
End User's first name
Surname
End User's last name
Department
End User's Department
Usual Site
End User's Usual Site. This will be used to auto-populate the Site field in Requests submitted by the End User or by an Analyst.
If you intend to configure End User Sites, be careful to set the Sites for your Priorities, otherwise your End Users will not be able to see any Priorities. If you don't check any Sites in Administration > Libraries > Priority, this configuration functions as "no Sites".
Telephone
End User's telephone number
End User's email address. If your Incoming Email Settings have been configured, this will be used to automatically identify the End User who submitted the email. If Outgoing Email Settings have been configured, and Email Notifications have been enabled in Email Settings & Bodies, then the End User will receive Email Notifications to this email account.
Fax
End User's fax number.
NTLM Login
Set to On to allow NTLM auto-login, Off to disable. If disabled, End Users will have to log in manually.
Auto Login
This setting is defunct. It has been replaced by NTLM Login. Leave this set to Off.
Block Survey
Turn On to block Surveys for this End User, Off to allow.
Documents
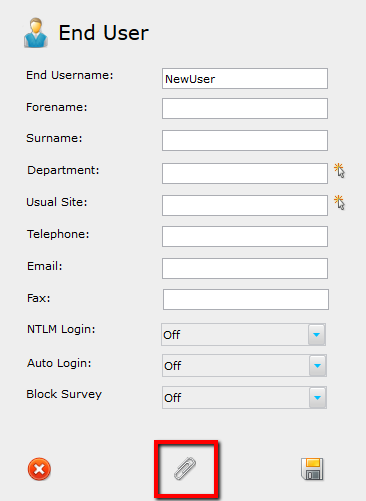
If End User Documents have been enabled, you will be given a document upload option in the End User Properties form:
Clicking the button will display a pop-up dialog that allows you to browse to and attach your documents. You may upload multiple files here, one at a time. The files may be viewed, downloaded, and deleted in the Analyst Request Form.
Contract
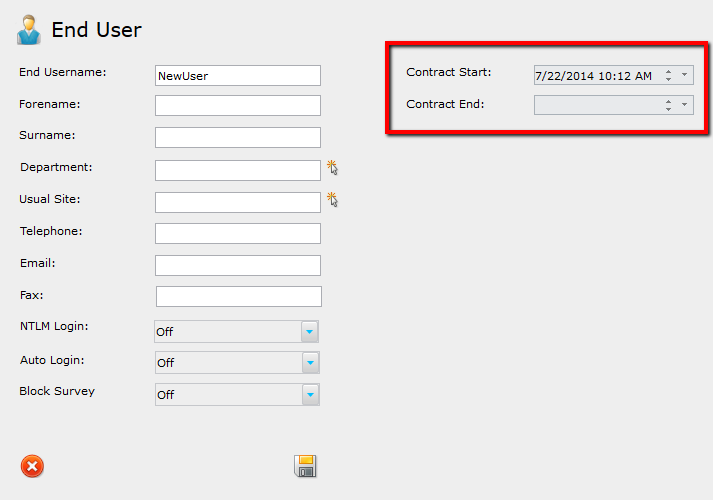
The end user properties form has two optional fields that may be added in Form Design > End User:
- sys_cont_startdate
- sys_cont_enddate
Once these are added to the form, then the End User properties page will allow a start date and end date to be entered:
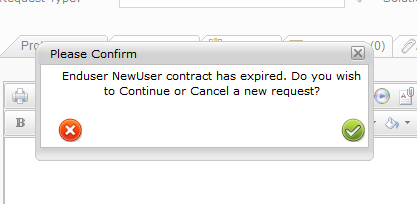
After the end user contract is set, the contract expiration alert will be enabled in the Analyst Request Form. When the End User is selected in the Analyst Request form, the contract period is checked. If the contract is not current, then an alert appears:
To proceed and ignore the warning, click the green check. To cancel the request, click the red X.
Settings
The End User settings are accessed by clicking the pencil button in the Setting column of the Manage End User panel. This is where the Administrator will go to configure Request Class access and Security settings on a per-End User basis. There is also a utility with several different options to copy the settings from one End User to many. This was developed to help streamline the End User configuration process.
Request Class
In the Request Class tab of the End User Settings, all available Request Classes are listed in the table. The End User will only have access to view and create requests in the selected Request Classes. For example, the End User below will have access to the General Requests and Network Request Classes:
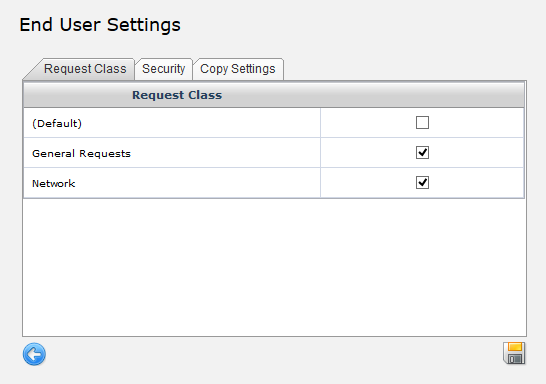
In order for these Request Class restrictions to take effect, Restrict End User Request Classes must be enabled in General Settings > Security > Global End User Security. If this setting is enabled, then the Add To New End User setting in Admin > Libraries > Request Classes becomes important. This setting determines whether the Request Class access will be given to newly created End Users or not.
Security
The default configuration permits End Users to only view requests assigned to them. This could be a request they logged and submitted themselves, or a request that an Analyst logged on their behalf. The Security settings allow the Administrator to allow additional requests to be viewed by the End User. Each Security setting is defined below.
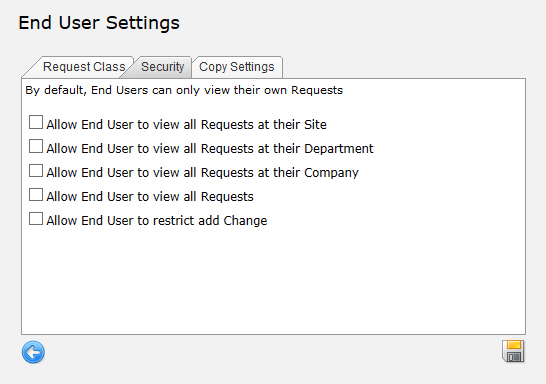
Allow End User to view all Requests at their Site
Enabling this allows the End User to view all Requests submitted at their Site.
Allow End User to view all Requests at their Department
Enabling this allows the End User to view all Requests submitted in their Department.
Allow End User to view all Requests at their Company
Enabling this allows the End User to view all Requests submitted at their Company.
Allow End User to view all Requests
Enabling this allows the End User to view all Requests submitted.
Allow End User to restrict add Change
When checked, End Users will not have the option to create new Changes in the Log New Request menu.
Copy Settings
The Copy Settings utility allows you to quickly change the settings of certain groups of End Users based upon the settings of a single user.
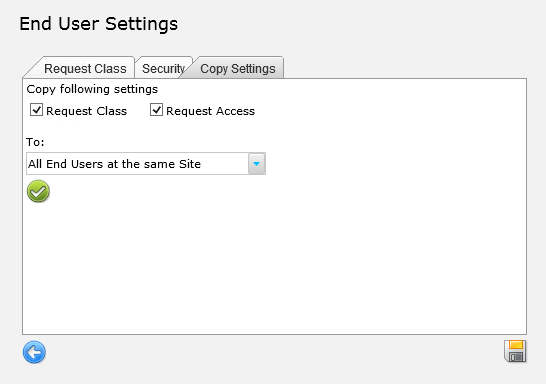
Procedure
- Configure Request Class and Security for this End User.
- Click the checkboxes for the settings you want to copy.
- In the To: drop-down menu, select the group of End Users to whom the settings will be copied.
- Click the Confirm button
 .
.
- In the confirmation dialog, click the Confirm button
 .
.
Password
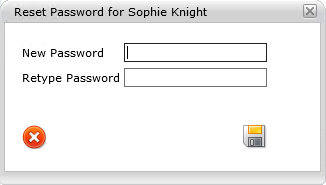
The End User password may be changed by clicking the pencil icon in the Password column of the Manage End User panel. The new password is entered and confirmed. Saving the change completes the password update.
Disable
On the Manage End User panel, each user may be disabled by checking the box in the Disabled column. Disabling a user will remove them from the various lists of End Users throughout the system as well release one End User license as seen in License Information.
Actions
Relocate End User
An End User can be relocated from one site to another in bulk by checking the Action checkbox for the End Users and clicking the Action button ![]() .
.
Delete
End Users may be manually deleted by clicking the bin for the user to be deleted. This will successfully delete the End User only if they are not associated with any Request. If there has been a request, comment, or any other record entered by the End User, the delete will provide a prompt explaining such. In order to complete a successful deletion, the End User must be completely disassociated from all previous records in the system. For this reason, it is generally advised that End Users are disabled instead, which essentially achieves the same results as deletion.
