Layton ServiceDesk - Reporting - Scheduling Reports
From Layton Support
(Difference between revisions)
m (Jpainter moved page Layton ServiceDesk - Scheduling Reports to Layton ServiceDesk - Reporting - Scheduling Reports: Standardised title structure) |
(New section "Temporary File Storage") |
||
| (One intermediate revision by one user not shown) | |||
| Line 1: | Line 1: | ||
<p align="right">[[File:btn_back_up.png|link=User Guide for Layton ServiceDesk]] [[User Guide for Layton ServiceDesk|<u>Back to Contents</u>]]</p> | <p align="right">[[File:btn_back_up.png|link=User Guide for Layton ServiceDesk]] [[User Guide for Layton ServiceDesk|<u>Back to Contents</u>]]</p> | ||
| − | <p align="right">[[File:btn_back_up.png|link=Layton ServiceDesk - Report Design Layout]] [[Layton ServiceDesk - Report Design Layout |<u>Previous article in this series: ''Report Design Layout''</u>]]</p> | + | <p align="right">[[File:btn_back_up.png|link=Layton ServiceDesk - Reporting - Report Design Layout]] [[Layton ServiceDesk - Reporting - Report Design Layout |<u>Previous article in this series: ''Report Design Layout''</u>]]</p> |
__FORCETOC__ | __FORCETOC__ | ||
=Overview= | =Overview= | ||
| Line 43: | Line 43: | ||
=Deleting a Scheduled Report= | =Deleting a Scheduled Report= | ||
| − | |||
#Click the Delete button [[File:Lsd delete 16px.png|link=]] for the applicable schedule. | #Click the Delete button [[File:Lsd delete 16px.png|link=]] for the applicable schedule. | ||
#In the confirmation dialog, click the Confirm button [[File:Lsd btn confirm 24px.png|link=]].<br /><p>[[File:Lsd reporting sched 05.png|link=]]</p> | #In the confirmation dialog, click the Confirm button [[File:Lsd btn confirm 24px.png|link=]].<br /><p>[[File:Lsd reporting sched 05.png|link=]]</p> | ||
| + | |||
| + | =Temporary File Storage= | ||
| + | Reports generated for a an email are stored in: | ||
| + | |||
| + | C:\Program Files (x86)\Layton Technology\Layton ServiceDesk\HB_Data\Export\ | ||
| + | |||
| + | These files are considered temporary, created here prior to being emailed, and can be safely deleted. Due to a limitation in the reporting engine relating to file permissions, these temporary files can't be deleted by Layton ServiceDesk. If you generate a lot of reports, you should check this folder occasionally to delete the contents. | ||
| + | <p align="right">[[File:btn_back_up.png|link=User Guide for Layton ServiceDesk]] [[User Guide for Layton ServiceDesk|<u>Back to Contents</u>]]</p> | ||
Latest revision as of 03:00, 19 September 2016
![]() Previous article in this series: Report Design Layout
Previous article in this series: Report Design Layout
Contents |
[edit] Overview
Reports can be scheduled to run at a set interval, which will produce a PDF or CSV file that is emailed to specified email addresses.
Any report other than a statistics report can be scheduled. The reports that can be scheduled produce a grid of results.

[edit] New Scheduled Report
- The Analyst who will be doing this procedure must have Reports Access enabled on their account, or they will not see the Reporting tab.
- Click the Add button
 . The Name dialog will open:
- Enter a name for the schedule in the Name field. Note that this is not necessarily the same as the report name.
- Select a report in the Report menu.
- Click a checkbox for the type of file attachment you want.
- Click the Save button
 .
.
- The Schedule dialog will open:
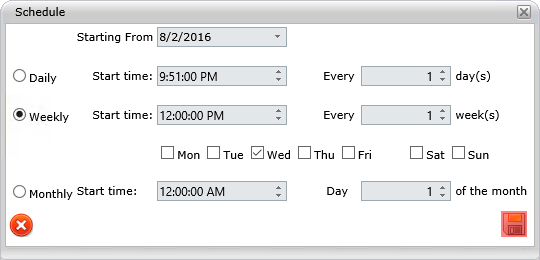
- Configure a start date (default is the current date) in the Starting From menu.
- Click the Daily, Weekly or Monthly radio button, then configure the remaining applicable settings.
- Click the Save button .
- The Report Email Body dialog will open:
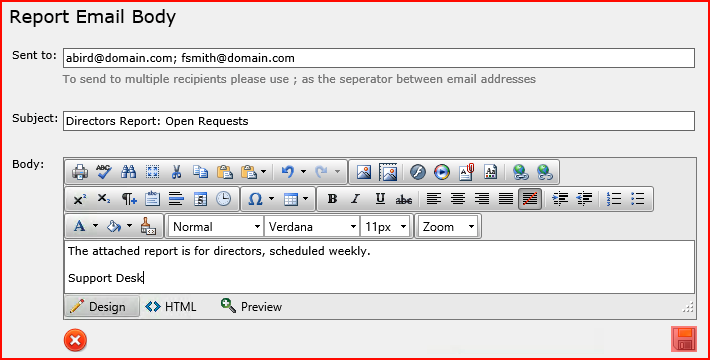
- Enter the email addresses to which the report will be emailed, separated by a semicolon, in the Sent to field.
- Enter a subject in the Subject field.
- Enter a body in the Body field.
- Click the Save button .
[edit] Modifying a Scheduled Report
[edit] Name and Attachment Type
- In the Manage Scheduled Reports list view, click the ID in the ID column, the name in the Name column, or the report in the Report column.
- The Name dialog will open:
- Make changes and click the Save button .
[edit] Schedule
- In the Manage Scheduled Reports list view, click the date in the Last Run Time column or the schedule in the Scheduling column.
- The Schedule dialog will open:
- Make changes and click the Save button .
[edit] Email Configuration
- In the Manage Scheduled Reports list view, click the email button
 for the schedule.
- The Report Email Body dialog will open:
- Make changes and click the Save button .
[edit] Deleting a Scheduled Report
- Click the Delete button
 for the applicable schedule.
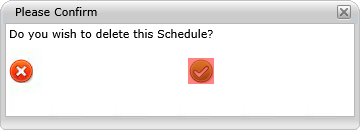
- In the confirmation dialog, click the Confirm button
 .
.
[edit] Temporary File Storage
Reports generated for a an email are stored in:
C:\Program Files (x86)\Layton Technology\Layton ServiceDesk\HB_Data\Export\
These files are considered temporary, created here prior to being emailed, and can be safely deleted. Due to a limitation in the reporting engine relating to file permissions, these temporary files can't be deleted by Layton ServiceDesk. If you generate a lot of reports, you should check this folder occasionally to delete the contents.