AuditWizard - Using AuditWizard - Administration - General - Database Maintenance - Change Database Wizard - SQL Migration
From Layton Support
(Difference between revisions)
m (Updated numbered-list style) |
(Updated for 8.4.4 and Windows 7) |
||
| Line 3: | Line 3: | ||
This procedure uses the migration feature to copy the data from the embedded database to SQL Server. | This procedure uses the migration feature to copy the data from the embedded database to SQL Server. | ||
| − | #Go to ''Administration > General > Database Maintenance'' and click the ''Change Database'' button:<br><p>[[File:aw_change_db.png]]<br></p> | + | #Go to ''Administration > General > Database Maintenance'' and click the ''Change Database'' button:<br><p>[[File:aw_change_db.png]]<br><br></p> |
| − | #Click Next:<br><p>[[File:aw_change_db_02.png]]<br></p> | + | #Click Next:<br><p>[[File:aw_change_db_02.png]]<br><br></p> |
| − | #Click the ''Create a new database'' radio button. Click the browse button next to the Server Name field and select your SQL Server name. The database name ''AuditWizard'' will be entered by default. Click Next:<br><p>[[File:aw_change_db_03.png]]<br></p> | + | #Click the ''Create a new database'' radio button. Click the browse button next to the Server Name field and select your SQL Server name. The database name ''AuditWizard'' will be entered by default, though it can be changed if necessary. Click Next:<br><p>[[File:aw_change_db_03.png]]<br><br></p> |
| − | #Click the ''Yes, migrate existing data to database'' radio button. Click Next:<br><p>[[File:aw_change_db_04.png]]<br></p> | + | #Click the ''Yes, migrate existing data to database'' radio button. Click Next:<br><p>[[File:aw_change_db_04.png]]<br><br></p> |
| − | #Click Finish:<br><p>[[File:aw_change_db_05.png]]<br></p> | + | #Click Finish:<br><p>[[File:aw_change_db_05.png]]<br><br></p> |
#The database will be copied to SQL Server. Once done, this dialog will appear. Click OK:<br><p>[[File:aw_change_db_06.png]]<br></p> | #The database will be copied to SQL Server. Once done, this dialog will appear. Click OK:<br><p>[[File:aw_change_db_06.png]]<br></p> | ||
AuditWizard will restart and will now be connected to the newly created SQL Server database. | AuditWizard will restart and will now be connected to the newly created SQL Server database. | ||
<p align="right">[[File:btn_back_up.png|link=AuditWizard™ - Using AuditWizard - Administration - General - Database Maintenance - Change Database Wizard]] [[AuditWizard™ - Using AuditWizard - Administration - General - Database Maintenance - Change Database Wizard|<u>Back</u>]]</p> | <p align="right">[[File:btn_back_up.png|link=AuditWizard™ - Using AuditWizard - Administration - General - Database Maintenance - Change Database Wizard]] [[AuditWizard™ - Using AuditWizard - Administration - General - Database Maintenance - Change Database Wizard|<u>Back</u>]]</p> | ||
Revision as of 01:34, 26 October 2015
This procedure uses the migration feature to copy the data from the embedded database to SQL Server.
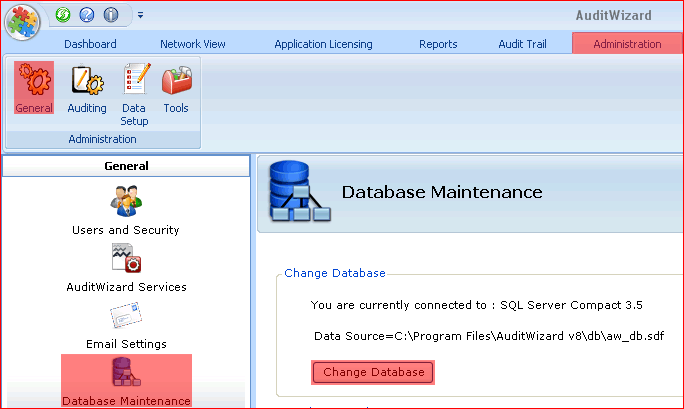
- Go to Administration > General > Database Maintenance and click the Change Database button:
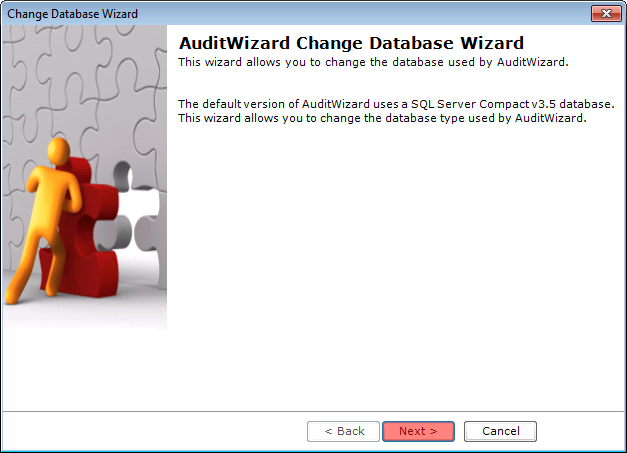
- Click Next:
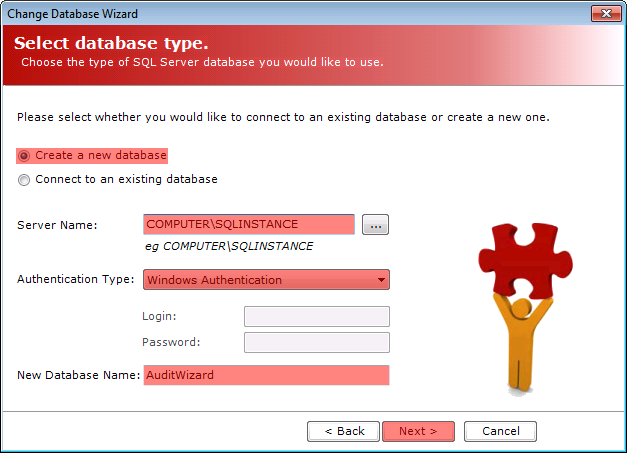
- Click the Create a new database radio button. Click the browse button next to the Server Name field and select your SQL Server name. The database name AuditWizard will be entered by default, though it can be changed if necessary. Click Next:
- Click the Yes, migrate existing data to database radio button. Click Next:

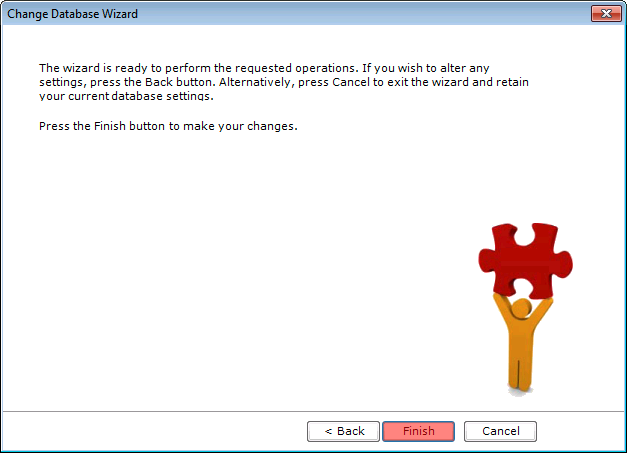
- Click Finish:
- The database will be copied to SQL Server. Once done, this dialog will appear. Click OK:
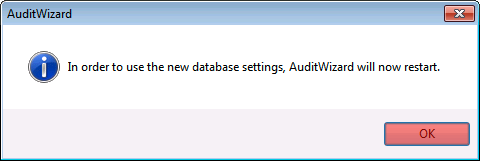


AuditWizard will restart and will now be connected to the newly created SQL Server database.