AuditWizard - Analysis Tools - Run a Trace
From Layton Support
(Difference between revisions)
m (Minor formatting changes) |
(Added note that a log is always produced) |
||
| Line 1: | Line 1: | ||
<p align="right">[[File:btn_back_up.png|link=User Guide for AuditWizard]] [[User Guide for AuditWizard|<u>Back to Contents</u>]]</p> | <p align="right">[[File:btn_back_up.png|link=User Guide for AuditWizard]] [[User Guide for AuditWizard|<u>Back to Contents</u>]]</p> | ||
This procedure will run the Scanner in logging mode, producing a log file useful for debugging why individual computers do not produce a usable .ADF audit file. It might also be used to test a specific Scanner version. | This procedure will run the Scanner in logging mode, producing a log file useful for debugging why individual computers do not produce a usable .ADF audit file. It might also be used to test a specific Scanner version. | ||
| + | |||
| + | Note that sometimes, with a beta version, AuditScanner.exe will not exit. A log will be produced, whether or not this occurs. | ||
#In '''[[AuditWizard - Using AuditWizard - Administration - Auditing - Upload Options#Auto-Upload|Administration > Auditing > Upload Options]]''', check ''Globally turn off auto-upload''. | #In '''[[AuditWizard - Using AuditWizard - Administration - Auditing - Upload Options#Auto-Upload|Administration > Auditing > Upload Options]]''', check ''Globally turn off auto-upload''. | ||
Revision as of 04:13, 20 May 2020
This procedure will run the Scanner in logging mode, producing a log file useful for debugging why individual computers do not produce a usable .ADF audit file. It might also be used to test a specific Scanner version.
Note that sometimes, with a beta version, AuditScanner.exe will not exit. A log will be produced, whether or not this occurs.
- In Administration > Auditing > Upload Options, check Globally turn off auto-upload.
- In Administration > Auditing > Scanner Configuration, change Re-audit Interval to 0 days.
- Check that all the desired Audited Items options are enabled.
- Click the Save Configuration button and the Deploy to Network button.
- Conditional: If testing a different version of the Scanner than is currently in use:
- Go to \\SERVERNAME\SHARE\scanner\.
- Create a new folder called Current.
- Move the existing AuditScanner.exe file into \\SERVERNAME\SHARE\scanner\Current\.
- Copy the testing AuditScanner.exe version into \\SERVERNAME\SHARE\scanner\.
- Log into the test computer as a domain admin.
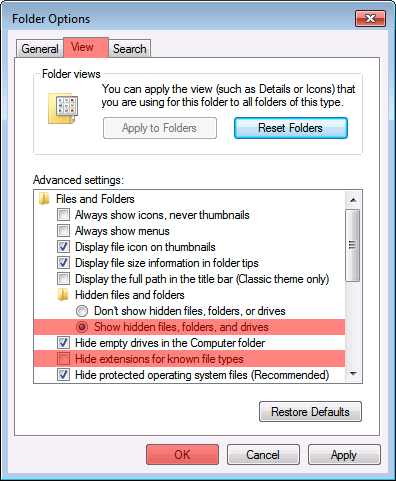
- Go to Start > Control Panel > Folder Options. Click the View tab. Change the following settings:
- Files and Folders > Hidden files and folders: Show hidden files and folders
- Files and Folders > Hide extensions for known file types: uncheck
- Click the OK button.
- Open Task Manager so that you can monitor when the Scanner stops running.
- Go to Start > Run. Enter
- \\SERVERNAME\AUDITWIZARDNETSHARE\scanner\AuditScanner.exe T
- and press the Enter key.
- A dialog will appear:
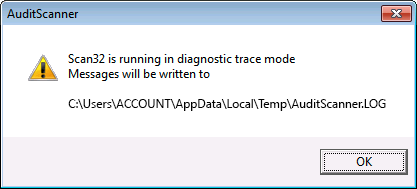
- Click OK to start.
- When AuditScanner.exe disappears from Task Manager, it has completed and quit.
- Navigate to C:\Users\YOURUSERNAME\AppData\Local\Temp\. Move AuditScanner.LOG to \\SERVERNAME\AUDITWIZARDNETSHARE\data\ for easy collection.
- Navigate to \\SERVERNAME\AUDITWIZARDNETSHARE\data\.
- Collect the following set of files:
- ASSETNAME.adf (if created)
- Log from step 10.
- In Administration > Auditing > Upload Options, uncheck Globally turn off auto-upload.
- Conditional: If testing a different version of the Scanner than is currently in use:
- Go to \\SERVERNAME\SHARE\scanner\.
- Create a new folder called Testing.
- Move the existing AuditScanner.exe file into \\SERVERNAME\SHARE\scanner\Testing\.
- Move the AuditScanner.exe file from \\SERVERNAME\SHARE\scanner\Current\ into \\SERVERNAME\SHARE\scanner\.
Zip the files and send to Support for analysis.