AuditWizard - Using AuditWizard - Administration - Data Setup - User Defined Data
Contents |
Overview
User defined data allows you to expand upon the information recovered during an audit and include additional information which will allow you to better track the use of your IT assets. Two distinct types of user defined data can be defined within AuditWizard, Asset and Application.
Any defined category becomes a tab in Details View in Network View and contains any fields within that category.
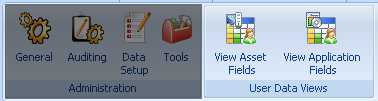
Asset User Defined data fields will be displayed for each asset defined within the database unless specifically defined for a specific asset type. Application User Defined Data fields are displayed for each Application audited. Note that this refers to the application as a whole and not to each instance of that application. To begin adding or editing user defined data, first ensure the correct type has been selected in the application ribbon:
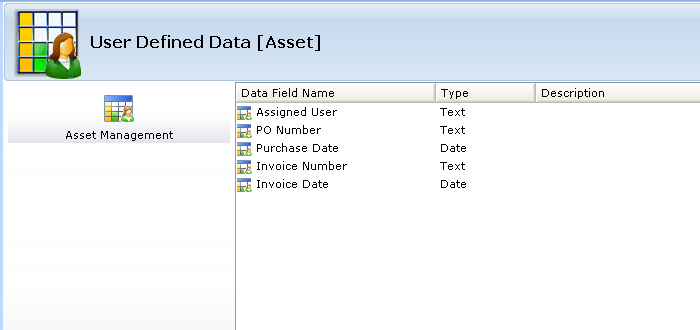
The right hand pane will clearly indicate whether Asset or Application fields are being displayed. The right hand pane is itself split into two parts - categories of user data are displayed to the left with the actual data fields displayed on the right. In the example shown below, it has been decided that each asset should include details of the purchasing information for that asset.
Adding a New User-Defined Data Category and Field
User-Defined Data Category
To create a new category of user defined data, click the Add button ![]() under the left-hand pane. Alternatively, right click in the left-hand pane of the user defined data window and select New Category from the context menu displayed. The following dialog will open:
under the left-hand pane. Alternatively, right click in the left-hand pane of the user defined data window and select New Category from the context menu displayed. The following dialog will open:
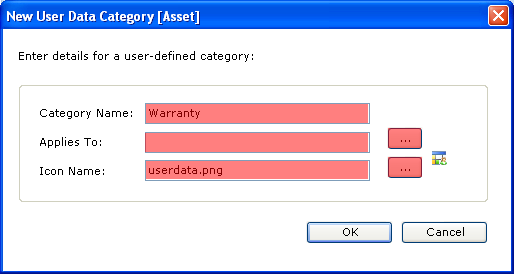
Category Name
This field defines the name by which the new category will be referred. It must be unique.
Applies To
In many cases fields which are applicable to one type of asset are not applicable to another. For example when defining asset data for a network printer you may want to include such things as its paper handling characteristics—these are of no use when looking at a PC.
To handle this, AuditWizard allows a user-defined data category to be set to only apply to a specific asset type or sub-type. For example, you could create a category which applies to all peripherals or which applies to a specific peripheral such as a network printer.
Icon Name
To facilitate identification of a specific category within the main network view, you may want to select an icon to display for that category (and the fields within the category). If you do not specify an icon, the generic user data icon will be shown.
To select an icon, browse to a folder containing the icon by clicking the ‘’.. button to display a standard file browser. AuditWizard is shipped with a selection of icons held in the \icons folder from which you can choose or you can specify your own icon.
Icons should be available in small (16x16), medium (32x32) and large (72x72) versions to ensure that they are correctly displayed in all cases. If necessary, copy the medium and large icons into the appropriate folders. The icon currently in use will be displayed to the right of the field.
Click OK when complete.
User-Defined Data Field
To add a new field within the Asset Management category, click the Add button ![]() under the right-hand pane. Alternatively, right click in the right pane and select New Field from the menu displayed. The following dialog will open to allow full details of the new field to be specified.
under the right-hand pane. Alternatively, right click in the right pane and select New Field from the menu displayed. The following dialog will open to allow full details of the new field to be specified.
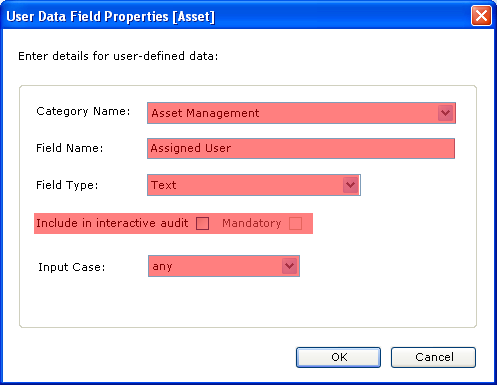
Category Name
This is the category within which this field will be defined. The different categories of data are displayed beneath those assets to which they relate. It is possible to constrain a category of data to a specific type of asset. For example some information may be pertinent to assets which have been classified as network printers but not applicable to PCs.
Field Name
This is the name by which this field can be identified.
Field Type
This can be either text, number, pick list, environment variable or registry entry.
Include in interactive audit
This will include the user defined field in an interactive audit. Interactive mode audits are enabled and configured in the AuditScanner Configuration.
Mandatory
Check this box to force the entry of data to this field during an interactive audit. Note that this setting has no effect within the main user interface.
Input Case
Force the case of a textual entry. This can be set to ANY Case, to leave the original entry unchanged, UPPER CASE to convert the input to be all uppercase, lower case to convert the input to be all lower case or Title Case to capitalize the first letter of each word in the input string.