AuditWizard - Installation Types - Remote Auditing - External Drive Method
From Layton Support
Use Case
- Computers that do not have a direct connection to the local network
- Computers that are rarely on the local network and thus have no connection to the AuditWizard share.
The method substitutes for a network share.
Steps
- Plug in an external drive such as a USB drive.
- Open Windows Disk Management.
- Format the drive.
- Right-click the drive and select Change Drive Letter and Paths.... Assign a drive letter that will not conflict with any currently in use.
- In AuditWizard, go to Administration > Auditing > AuditScanner Configuration.
- Click the New Configuration button.
- Configure the settings. Notes:
- The network share information will be flagged as incorrect. This can be ignored.
- Configure the Audited Items as desired.
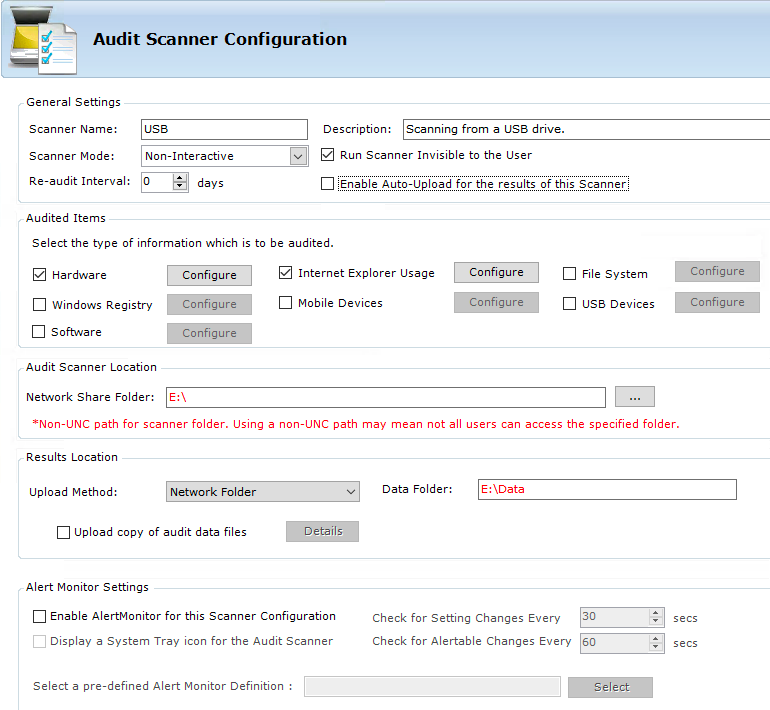
- Click the Save Configuration button.
- Click the Deploy to Network button. This will write the folder structure and files to the drive.
- For convenience, open the drive and put a shortcut to AuditScanner.exe in the root.
How it Works
Plug the drive into a computer. Open it and double-click the AuditScanner.exe shortcut. Note that on later versions of Windows you may need to right-click the shortcut and select Run as administrator.
The audit files will be written to DRIVELETTER\data.
Once audit files have been collected, plug the drive into the AuditWizard server and move the files from the data folder into the data folder in the network share. AuditWizard will then upload them.