Layton ServiceDesk - Settings - Libraries - Email Settings & Bodies - Editing
![]() Previous article in this series: Email Settings & Bodies > List
Previous article in this series: Email Settings & Bodies > List
Contents |
Overview
The various automatic email notification triggers can be enabled and the Email Bodies modified by going to Administration > Libraries > Email Settings & Bodies. The control panel will be displayed:
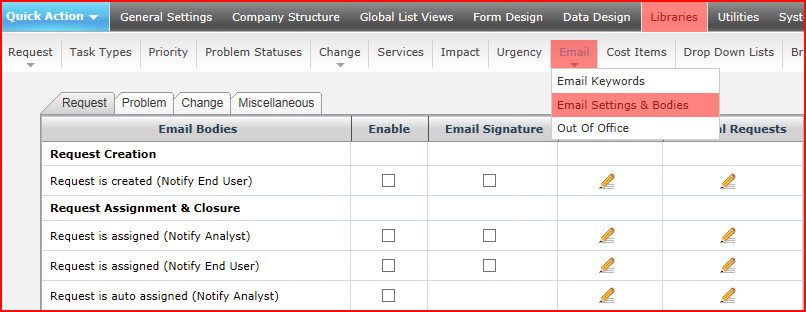
To enable an email notification, select the Enable check box next to the desired notification (Note that all of the "Escalation" Emails are grouped together with one Enable section which will apply to all Escalation emails). Notification triggers are configured for Request, Problems and Changes separately. Problem, Change and Miscellaneous are accessible via tabs near the top. In order for the automatic email notifications to be sent, the Email Server Settings must be properly configured.
Editing Email Bodies
Each Email Notification provides an Email Body (the text in an automated email notification) for each Request Class. To configure the Email Body, click the Edit button ![]() in the column for the desired Request Class. The Manage Email Body dialog will appear:
in the column for the desired Request Class. The Manage Email Body dialog will appear:
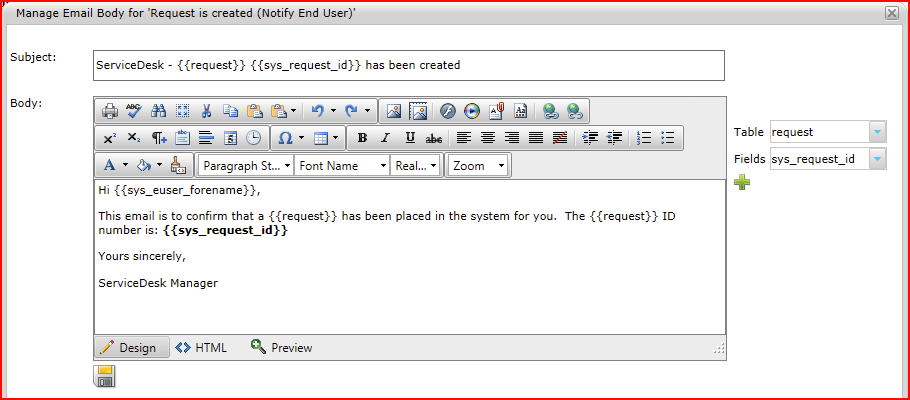
To insert system or user fields into the body, select the desired field in the Table and Fields menus on the right. Click the Add button ![]() to insert the field, enclosed in braces, into the bottom of the email body. This field can be cut and pasted anywhere within the body. When the email is triggered and generated, the value for each field will be dynamically inserted into the email body. For example, in the Email Body for Request is Assigned (Notify Analyst), you may want to include the sys_requesttype_id (Request Type) and the sys_problemdesc (Problem Description) fields.
to insert the field, enclosed in braces, into the bottom of the email body. This field can be cut and pasted anywhere within the body. When the email is triggered and generated, the value for each field will be dynamically inserted into the email body. For example, in the Email Body for Request is Assigned (Notify Analyst), you may want to include the sys_requesttype_id (Request Type) and the sys_problemdesc (Problem Description) fields.
Adding Images to Email Bodies
It's attractive and useful to add images to email notifications for branding. Copy your images to C:\Program Files (x86)\Layton Technology\Layton ServiceDesk\HB_Data\Editor_Folder\Image. Images can then be added to the body by clicking the Image Manager button ![]() in the toolbar, selecting the desired image and clicking the Insert button.
in the toolbar, selecting the desired image and clicking the Insert button.