Layton ServiceDesk - Settings - Form Design - Banner
(Added section "Changing Appearance") |
(Extensive modification to section "Changing Logo Size") |
||
| Line 44: | Line 44: | ||
=Changing Appearance= | =Changing Appearance= | ||
==Company Logo== | ==Company Logo== | ||
| − | The page element you probably most want to change is the Layton ServiceDesk logo. | + | The page element you probably most want to change is the Layton ServiceDesk logo. You will need to prepare a replacement logo prior to modification of the banner design. It is recommended that you use PNG format, with transparency, for best results. |
| + | |||
| + | [[File:Lsd banner logo 01.png|center|link=]] | ||
| + | ===Procedure=== | ||
| + | #Prepare your replacement logo. Recommended size is 240 x 65 pixels or less. These are the dimensions of the default Layton ServiceDesk image, ''Layton-ServiceDesk_Logo_White.png''. | ||
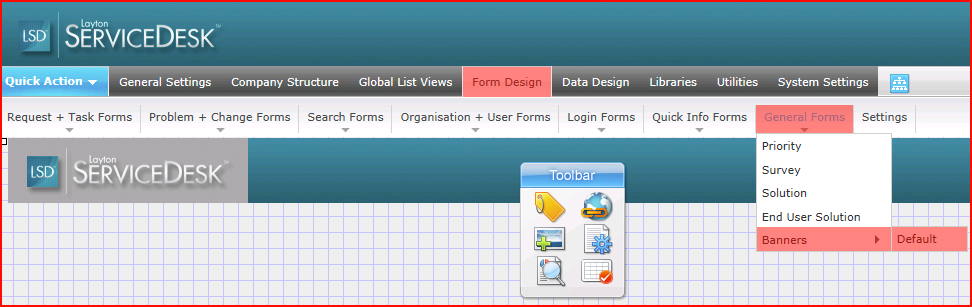
| + | #Go to ''Administration > Form Design > General Forms > Banners > Default''. | ||
| + | #Click the Layton ServiceDesk logo. | ||
| + | #Click the Delete button [[File:Lsd btn delete 24px.png|link=]] to remove it. | ||
| + | #Click the Add Image button [[File:Lsd btn toolbar image 32px.png|link=]]. | ||
| + | #Click the Select button [[File:Lsd btn select 16px.png|link=]] next to the ''Image Source'' field. | ||
| + | #In the left-hand pane, click the ''User'' folder. | ||
| + | #Click the ''Upload'' button. | ||
| + | #Click the ''Select'' button. | ||
| + | #Navigate to where your replacement logo is, click it and click the ''Open'' button. This will populate one of the three filename fields. | ||
| + | #Click the Upload button to upload the image. | ||
| + | #In the User folder in the Select Image dialog, double-click the replacement logo. This will take you back to the Image Properties page. | ||
| + | #You can specify the position on the page here or drag it later. | ||
| + | #Click the Save button [[File:Lsd btn save.png|link=]]. | ||
| + | #Drag the Image to the desired position. | ||
| + | |||
| + | ==Changing Logo Size== | ||
| + | If the image is too large or too small, you can adjust the dimensions in the Image Properties page. By entering a value of pixels in the ''Image Width'' or ''Image Height'' fields, you can control the dimensions. Note that you don't have to specify both. For example, for a 240-pixel-wide image, entering ''50'' in the ''Image Height'' field will proportionally adjust the width. | ||
| + | |||
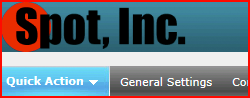
| + | In this example, by adjusting the height of both the logo and the banner background to a height of 50 pixels, you can make the banner appear smaller. | ||
| + | |||
| + | [[File:Lsd banner size 01.png|center|link=]] | ||
| + | |||
| + | In this example, the logo and banner background image have been resized to 80 pixels high and the image is cropped. | ||
| + | |||
| + | [[File:Lsd banner size 02.png|center|link=]] | ||
| + | |||
| + | The banner height is fixed at 65 pixels high. | ||
| + | |||
| + | It is recommended to prepare your image at the size you will be using them for best render quality. In the larger size example above, the image begins to look fuzzy with the upscaling. | ||
| + | <p align="right">[[File:btn_back_up.png|link=User Guide for Layton ServiceDesk™]] [[User Guide for Layton ServiceDesk™|<u>Back to Contents</u>]]</p> | ||
Revision as of 00:49, 19 January 2015
Contents |
Overview
The Banner is the strip above the menu system. On installation, it's branded with our Layton ServiceDesk logo. This is customisable.
There is always at least one default banner configured in the system.
Toolbar Buttons
| Button | Name | Description |
|---|---|---|
| Label | Add a text string to the banner region. | |
| Add Hyperlink | Add a static hyperlink. | |
| Add Image | Add an image to the banner. | |
| Page Properties | Change colors and Whiteboard properties. | |
| Preview Mode | View the proposed changes. | |
| Snap to Grid | Toggle between page elements snapping to the grid and arbitrary pixel placement. |
Changing Appearance
Company Logo
The page element you probably most want to change is the Layton ServiceDesk logo. You will need to prepare a replacement logo prior to modification of the banner design. It is recommended that you use PNG format, with transparency, for best results.
Procedure
- Prepare your replacement logo. Recommended size is 240 x 65 pixels or less. These are the dimensions of the default Layton ServiceDesk image, Layton-ServiceDesk_Logo_White.png.
- Go to Administration > Form Design > General Forms > Banners > Default.
- Click the Layton ServiceDesk logo.
- Click the Delete button
 to remove it.
- Click the Add Image button
 .
.
- Click the Select button
 next to the Image Source field.
- In the left-hand pane, click the User folder.
- Click the Upload button.
- Click the Select button.
- Navigate to where your replacement logo is, click it and click the Open button. This will populate one of the three filename fields.
- Click the Upload button to upload the image.
- In the User folder in the Select Image dialog, double-click the replacement logo. This will take you back to the Image Properties page.
- You can specify the position on the page here or drag it later.
- Click the Save button
 .
.
- Drag the Image to the desired position.
Changing Logo Size
If the image is too large or too small, you can adjust the dimensions in the Image Properties page. By entering a value of pixels in the Image Width or Image Height fields, you can control the dimensions. Note that you don't have to specify both. For example, for a 240-pixel-wide image, entering 50 in the Image Height field will proportionally adjust the width.
In this example, by adjusting the height of both the logo and the banner background to a height of 50 pixels, you can make the banner appear smaller.
In this example, the logo and banner background image have been resized to 80 pixels high and the image is cropped.

The banner height is fixed at 65 pixels high.
It is recommended to prepare your image at the size you will be using them for best render quality. In the larger size example above, the image begins to look fuzzy with the upscaling.