AuditWizard - Using AuditWizard - Running the Scanner in Interactive Mode
(New page) |
(Major addition) |
||
| Line 5: | Line 5: | ||
=Configuration= | =Configuration= | ||
| + | The interactive mode applies to the Scanner, not the Agent, and is configured in the Scanner settings. | ||
| + | [[File:Aw scanner interactive 01.png|center|link=]] | ||
| + | |||
| + | ==Scanner Mode== | ||
| + | ===Non-Interactive=== | ||
| + | This disables the interactive dialog that appears when the Scanner is run. | ||
| + | |||
| + | ===Interactive=== | ||
| + | Every time the Scanner is run, the user will see the dialog so that data can be added or edited. | ||
| + | |||
| + | ===First Time Interactive=== | ||
| + | This setting is the same as ''Interactive'', but will only present the edit dialog if the computer has not been audited before. | ||
| + | |||
| + | ==Interactive Options== | ||
| + | Click the ''Interactive Options'' button to open the Interactive Audit Designer dialog. | ||
| + | |||
| + | [[File:Aw scanner interactive 02.png|center|link=]] | ||
| + | |||
| + | |||
| + | ===Allow the User to Cancel the Audit=== | ||
| + | This setting lets the user stop the audit at any time during the dialog interaction. | ||
| + | |||
| + | ===Display Basic Asset Information Screen=== | ||
| + | Fields from the ''Basic Information'' tab, viewable when an asset is selected in ''Network View'', will be displayed. Four of these fields can be independently displayed or hidden. | ||
| + | |||
| + | ===Display Asset Location Screen=== | ||
| + | A separate page of the dialog will present the location structure so that the user can select where the computer is located. | ||
| + | |||
| + | ===Display User Defined Data Screen(s)=== | ||
| + | A separate page of the dialog will present the user-defined fields, one page per user-defined data category. | ||
==Pre-Population of Fields== | ==Pre-Population of Fields== | ||
| Line 11: | Line 41: | ||
==Overwriting Fields== | ==Overwriting Fields== | ||
| − | |||
=Scanner Procedure= | =Scanner Procedure= | ||
Revision as of 01:23, 29 November 2016
Contents |
Overview
The Scanner can be run in interactive mode, prompting the user to enter information to fill certain fields instead of automatically auditing them.
Configuration
The interactive mode applies to the Scanner, not the Agent, and is configured in the Scanner settings.
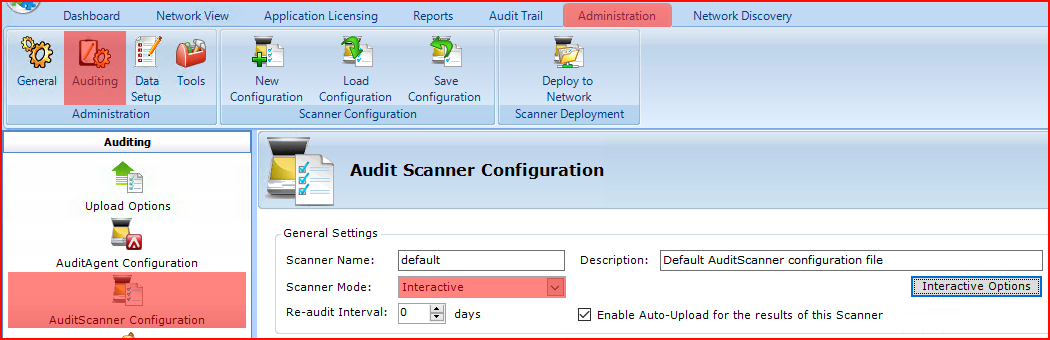
Scanner Mode
Non-Interactive
This disables the interactive dialog that appears when the Scanner is run.
Interactive
Every time the Scanner is run, the user will see the dialog so that data can be added or edited.
First Time Interactive
This setting is the same as Interactive, but will only present the edit dialog if the computer has not been audited before.
Interactive Options
Click the Interactive Options button to open the Interactive Audit Designer dialog.
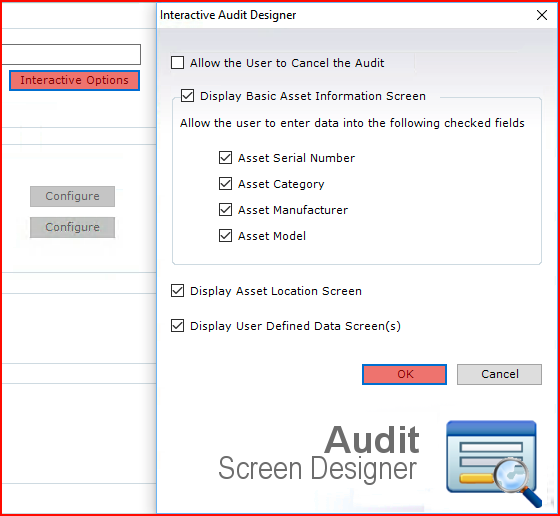
Allow the User to Cancel the Audit
This setting lets the user stop the audit at any time during the dialog interaction.
Display Basic Asset Information Screen
Fields from the Basic Information tab, viewable when an asset is selected in Network View, will be displayed. Four of these fields can be independently displayed or hidden.
Display Asset Location Screen
A separate page of the dialog will present the location structure so that the user can select where the computer is located.
Display User Defined Data Screen(s)
A separate page of the dialog will present the user-defined fields, one page per user-defined data category.