AuditWizard - Using AuditWizard - Administration - General - Email Settings
![]() Previous article in this series: AuditWizard Services
Previous article in this series: AuditWizard Services
Contents |
Overview
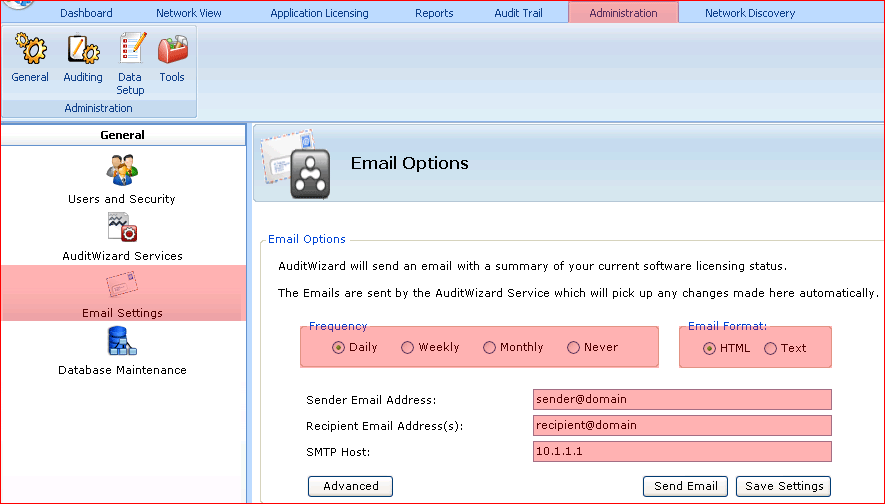
AuditWizard can be configured to send a summary report on a schedule, covering information like how many assets were discovered in the last period (configured in Frequency below), asset statuses, and software compliance.

Settings
Frequency
How often you would like a summary email to be sent.
Sender Email Address
This must be a valid email address and will be used in conjunction with the SMTP host to send emails. As such the sender email address must be valid for use on the specified SMTP host.
Recipient Email Address(s)
A semicolon-delimited list of email addresses to which the AuditWizard summary email is to be sent. Separate individual email addresses using a semi-colon (';') character such as:
[email protected]; [email protected]
SMTP Host
This is the fully qualified name of the SMTP host through which the emails will be sent.
Send Email
Clicking this button will cause a test email to be sent to the specified email addresses. If there are errors in the email configuration they will be reported at this time.
Advanced
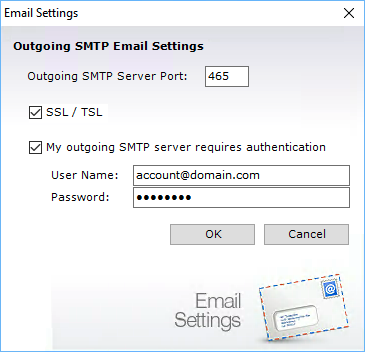
In many cases it is necessary to specify additional settings before it is possible to send email via an SMTP host. Clicking this button will display the Advanced Email Settings form as shown below:

Outgoing SMTP Port
By default this is set to the standard SMTP port value of 25. If the server requires SSL or TSL, the default is 465. If your email system uses a different port number, please specify this here.
SSL / TLS
If the server requires Secure Sockets Layer (SSL) or Transport Layer Security (TLS), check this setting.
My outgoing SMTP server requires authentication
To prevent mis-use of SMTP hosts it is often necessary to authenticate with the server before being authorized to send email via that server. Check this box if this is the case for the SMTP server specified. You should then enter the credentials that you use to authenticate with the SMTP server.
Click the OK button to confirm the new settings and return to Email Settings.